Topic outline
-
Welcome to the SafeSpot Worker Health Wearable Installation and Maintenance Guide. SafeSpot, developed by Metasense, is a cutting-edge wearable device designed to ensure the well-being of workers in various industries by monitoring key environmental factors. This device offers comprehensive insights into worker health and safety, including real-time UV exposure levels, temperature, and humidity conditions.
This guide will walk you through the essential steps to install and maintain your SafeSpot Worker Health Wearable device. We will provide you with detailed instructions on setting up your device, connecting it to the SafeSpot Mobile app, and ensuring its continuous functionality. By following the guidelines presented here, you will maximize the benefits of SafeSpot device.
-
-
Securing Your Device to Your Safety Helmet:
When it comes to securing a device to your helmet, it's essential to follow a few straightforward steps to ensure a secure and reliable attachment. Many devices come equipped with an adhesive stick for this purpose, and by following the instructions below, you can get your device securely mounted on the top front side of your safety helmet. 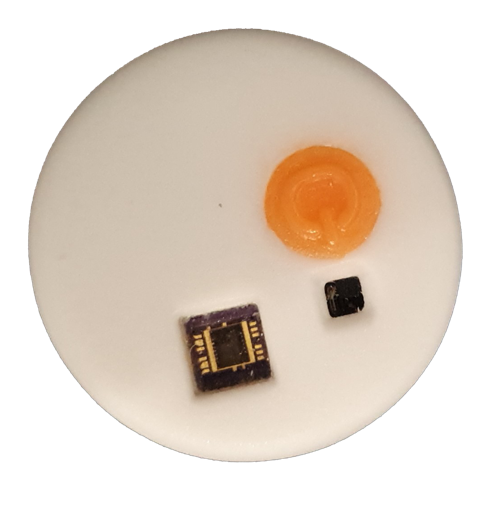
Step 1: Uncover the Adhesive
The first step is to locate the adhesive stick provided with your device. This stick is often protected by a removable band or covering. Carefully remove this protective layer to expose the adhesive surface beneath. Take your time during this process to avoid damaging the adhesive or your device.
Step 2: Choose the Location
Before attaching the device, decide on the precise spot on your helmet where you want to place it. Most commonly, devices are attached to the top front side of the helmet to ensure optimal UV exposure and ease of access.
Step 3: Apply with Gentle Pressure
With the adhesive exposed and your chosen location in mind, gently press the device onto the desired area of your helmet. Apply even pressure to ensure a strong bond between the device and the helmet. This step is crucial, as it ensures that the device is securely affixed and won't come loose during use.
Step 4: Confirm the Secure Attachment
After applying the device with gentle pressure, double-check to ensure it is securely in place. Examine the edges to ensure there are no air bubbles or gaps that might compromise the attachment. Make any necessary adjustments to guarantee a secure fit.
By following these simple steps, you can confidently attach your device to your safety helmet, allowing you to use it effectively and safely in your activities or work while ensuring it remains securely in place.

-
-
-
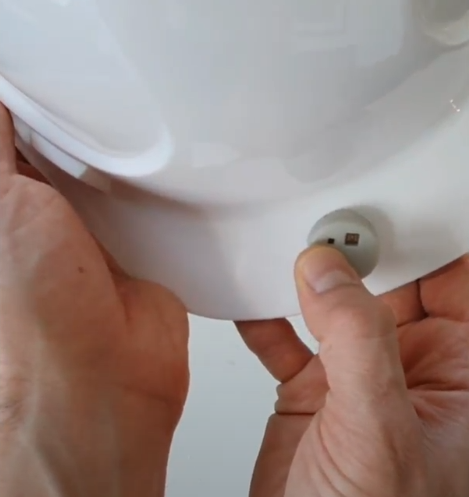
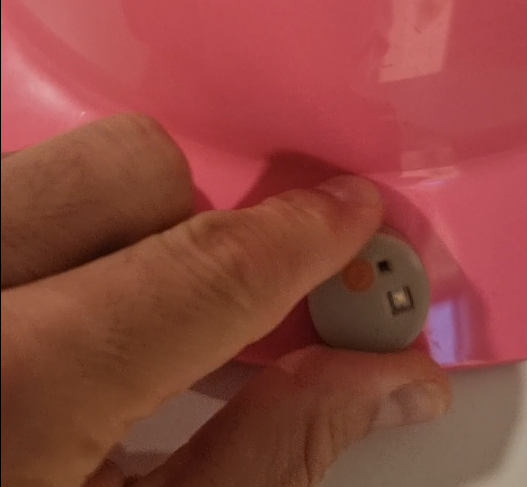
How to Turn device On and Off:
To activate SafeSpot, follow these instructions: Press the orange button, and observe the red flashing light to confirm its activation.
To deactivate SafeSpot, use the same method: Press the orange button, and ensure the red flashing light turns off to indicate deactivation.
Note: If you do not observe the red flash, it may be due to a low battery. Please refer to the battery replacement section for assistance.
-
How to Replace Battery:
Note: Before you begin, ensure that the SafeSpot device is turned off. If the device is currently on, please turn it off.
-
Opening the Device:
- Locate the top part of the SafeSpot device.
- Gently hold the top part and turn it anticlockwise to open the case.
-
Accessing the Battery:
- Once the case is open, you will have access to the old battery.
-
Removing the Old Battery:
- Carefully remove the old battery from its compartment. Be sure to dispose of the old battery properly according to local regulations for battery recycling.
-
Inserting the New Battery:
- Take the new battery and observe the photo provided or the markings on the device.
- Insert the new battery into the compartment with the positive side facing up. Ensure that it fits securely in place.
-
Closing the Device:
- Now, take the upper part of the case that you separated in the previous step.
- Align it correctly with the device and carefully tighten it by turning it clockwise. Make sure it is firmly secured.
-
Powering On the Device:
- After successfully replacing the battery and securing the case, you can turn the device back on.
Note: Make sure to use the correct type and model of battery recommended for the SafeSpot device. Using an incorrect battery can damage the device and void any warranty.
Your SafeSpot device should now be powered by the new battery, and you can continue to enjoy its functionality. If you encounter any issues or have questions during the process, refer to the device's user manual or contact customer support for assistance.

(1) (2) -
-