Topic outline
-
Welcome to SafeSpot, your companion app for the SafeSpot wearable device – an innovative tool designed to safeguard workers by monitoring UV exposure, temperature, and humidity. This guide will walk you through the simple steps to install and begin using the SafeSpot app, ensuring you make the most out of your wearable's features.
-
-
- Open your device's app store:
- On iOS devices, use the 'App Store.'
- On Android devices, use 'Google Play Store.'
- Use the search function within your app store.
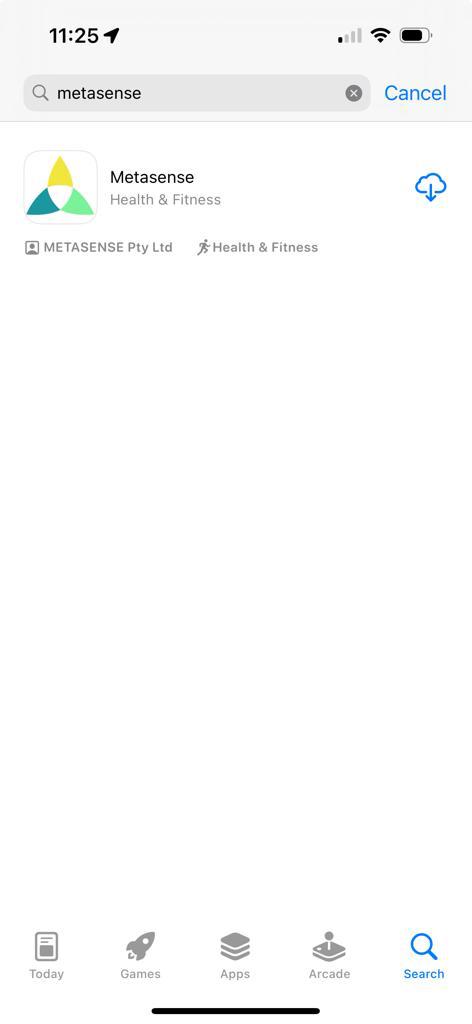
- Type 'Metasense' into the search bar and initiate the search.
- Look for the 'Metasense' app in the search results.
- Select the application from the list to view its details.
- Click on 'Download' or 'Install' to begin the installation process.
- Wait for the app to download and install on your device.
- Once installed, open 'Metasense' by tapping on the app icon on your home screen or app drawer.
By following these instructions, you should be able to successfully locate, download, and install the 'Metasense' app on your smartphone or tablet.
- Open your device's app store:
-
-
-
To log in to an application with a provided username and password, you can generally follow these steps:
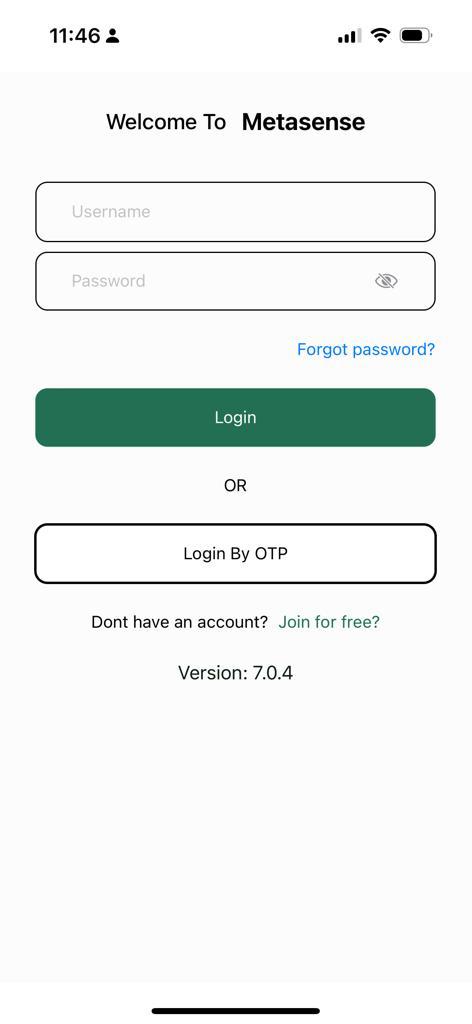
- Open the application on your device.
- Navigate to the login screen, which typically appears when you open an app that requires authentication.
- Enter the provided username into the field labeled "Username".
- Enter the provided password into the field labeled "Password." Ensure you enter it exactly as provided, respecting any upper or lowercase letters, numbers, and special characters.
- If there is an option to "Show Password," you may use this to verify that you have entered the password correctly.
- Look for a button or link that says "Log In, and tap or click on it to proceed.
- If the credentials are correct, you should gain access to the application and its features.
Remember to keep your login credentials secure and not to share them with others.
-
-
-
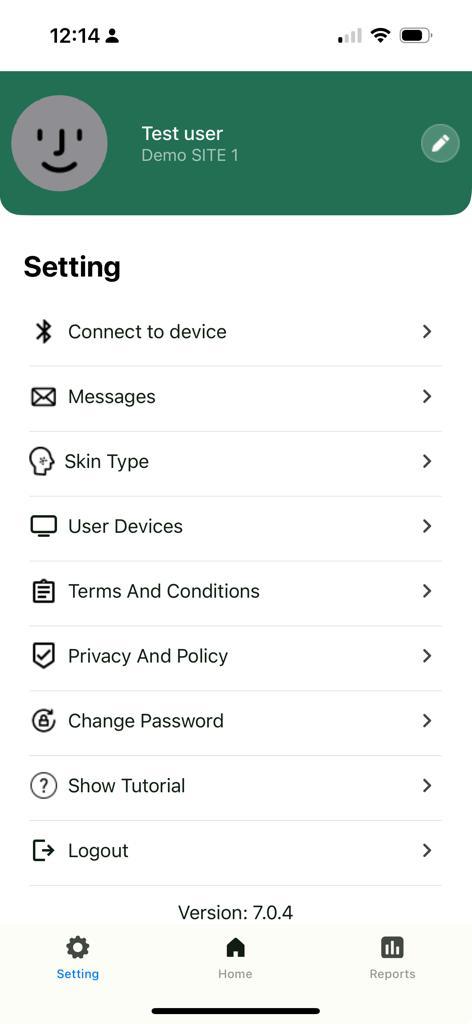
Setting Skin Type:
To optimize your experience with our UV monitoring and alerting app, it's important to configure it according to your skin type. This customization helps the app provide more accurate UV exposure alerts. Here's how to set it up:
- Open the app and head to the 'Settings' menu.

- Scroll to find the 'Skin Type' option and tap on it.

- A list will appear with different skin types. Choose the one that corresponds to your skin.
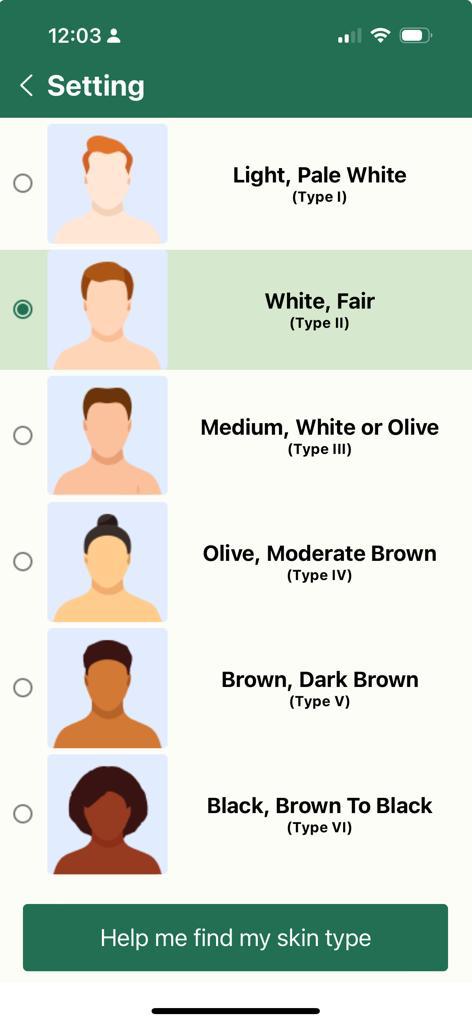
- If you are uncertain about which skin type you have, select the 'Help me find my skin type' wizard for assistance.
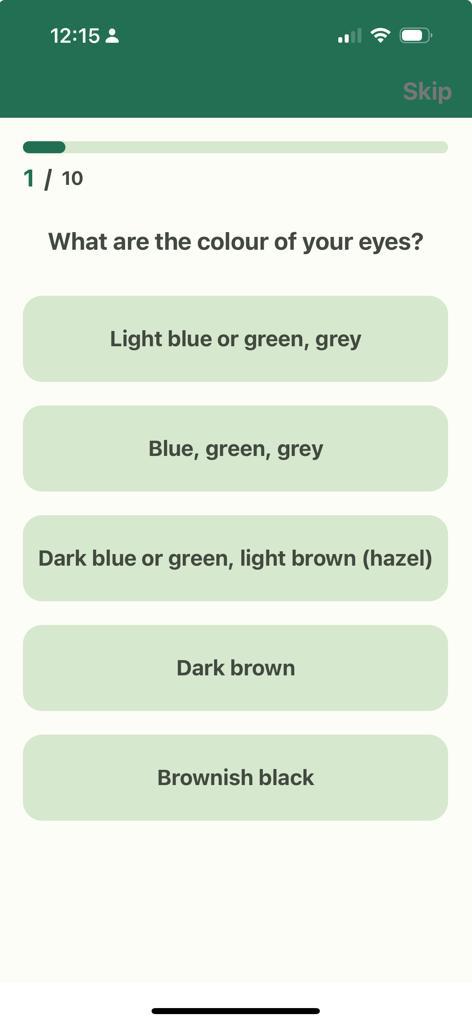
- The wizard will take you through a set of questions to help identify your skin type accurately.
Once you've selected your skin type, the app will adjust its UV alerts to match your sensitivity level, ensuring you're better protected against harmful UV rays.
- Open the app and head to the 'Settings' menu.
-
Connect to Device:
To connect your mobile app to the SafeSpot wearable device, please follow these steps:
- Open the mobile app and navigate to the "Setting" menu.
- Tap on the "Connect to device" option within the settings.
- Grant the required permissions by tapping on the "OK" button when prompted. This will usually involve enabling Bluetooth and location services.
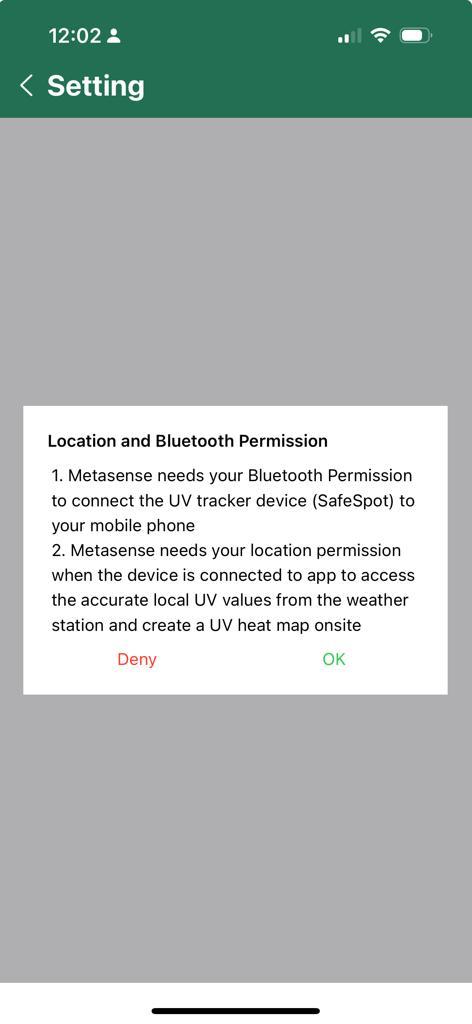
- Once permissions are granted, the app will begin searching for available devices.

- Locate your preconfigured SafeSpot device in the list of available devices.
- Tap on your SafeSpot device to initiate the connection process.
Make sure that your SafeSpot device is turned on and within range during this process for a successful connection.
- Open the mobile app and navigate to the "Setting" menu.
-
-
-
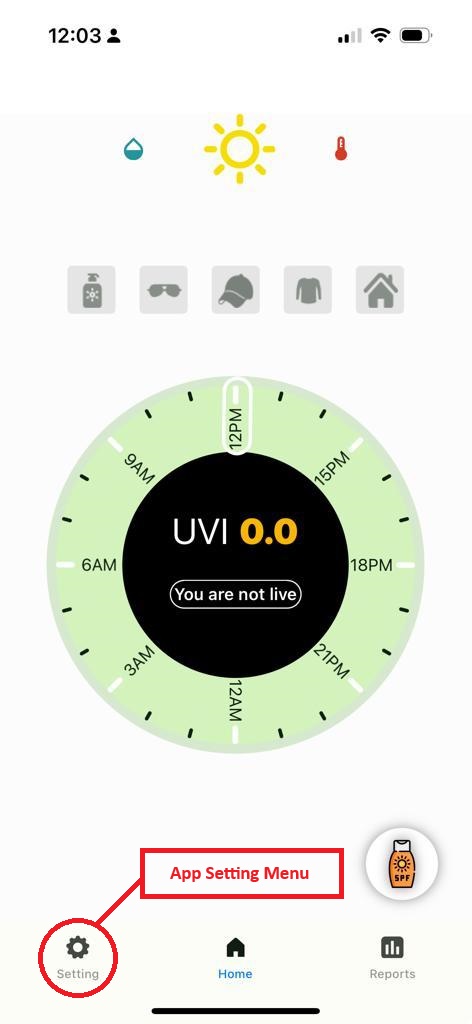
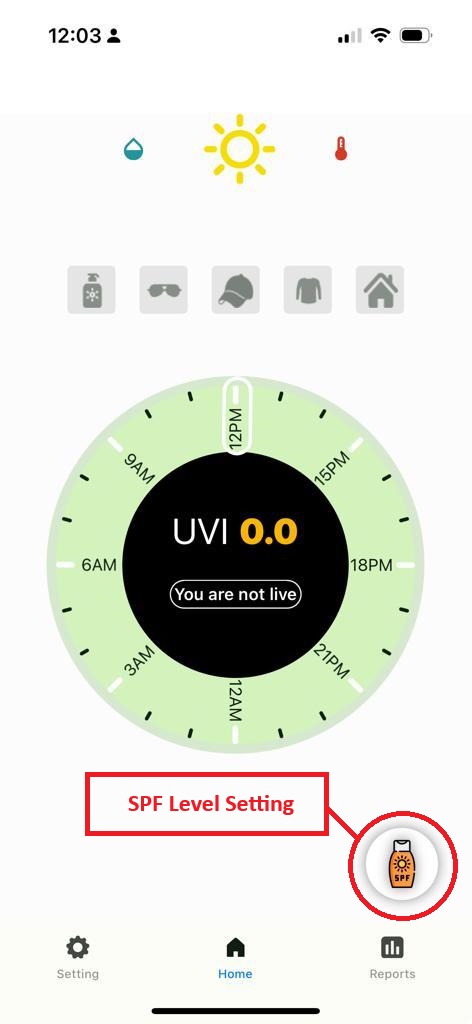
Dashboard:
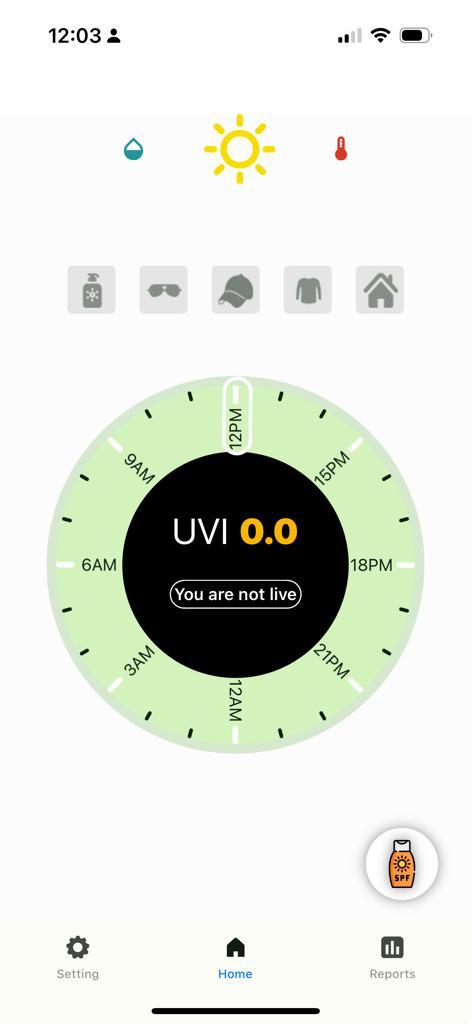
To use the app dashboard screen effectively, follow these instructions:
-
Sensor Status Overview:
- UV, Temperature, Humidity Sensors: These indicators display the current status of your environmental sensors. A green light typically means normal operation, while red may indicate an issue or abnormal readings. Check these first to get an overview of the conditions.
-
Alert Icons:
- Attention Needed: If any alert icons are lit up or flashing, tap on them to get detailed information about potential issues or notifications that require your attention.
-
UV Live Monitor:
- Monitoring UV Exposure: This section gives you real-time data on UV radiation levels. Keep an eye on this to ensure you're not being exposed to harmful levels of UV light.
-
SPF Input:
- Set Your SPF Protection: Here, you can input the Sun Protection Factor (SPF) level of the sunscreen you are using. This helps the app to better advise you on exposure times and safety precautions.
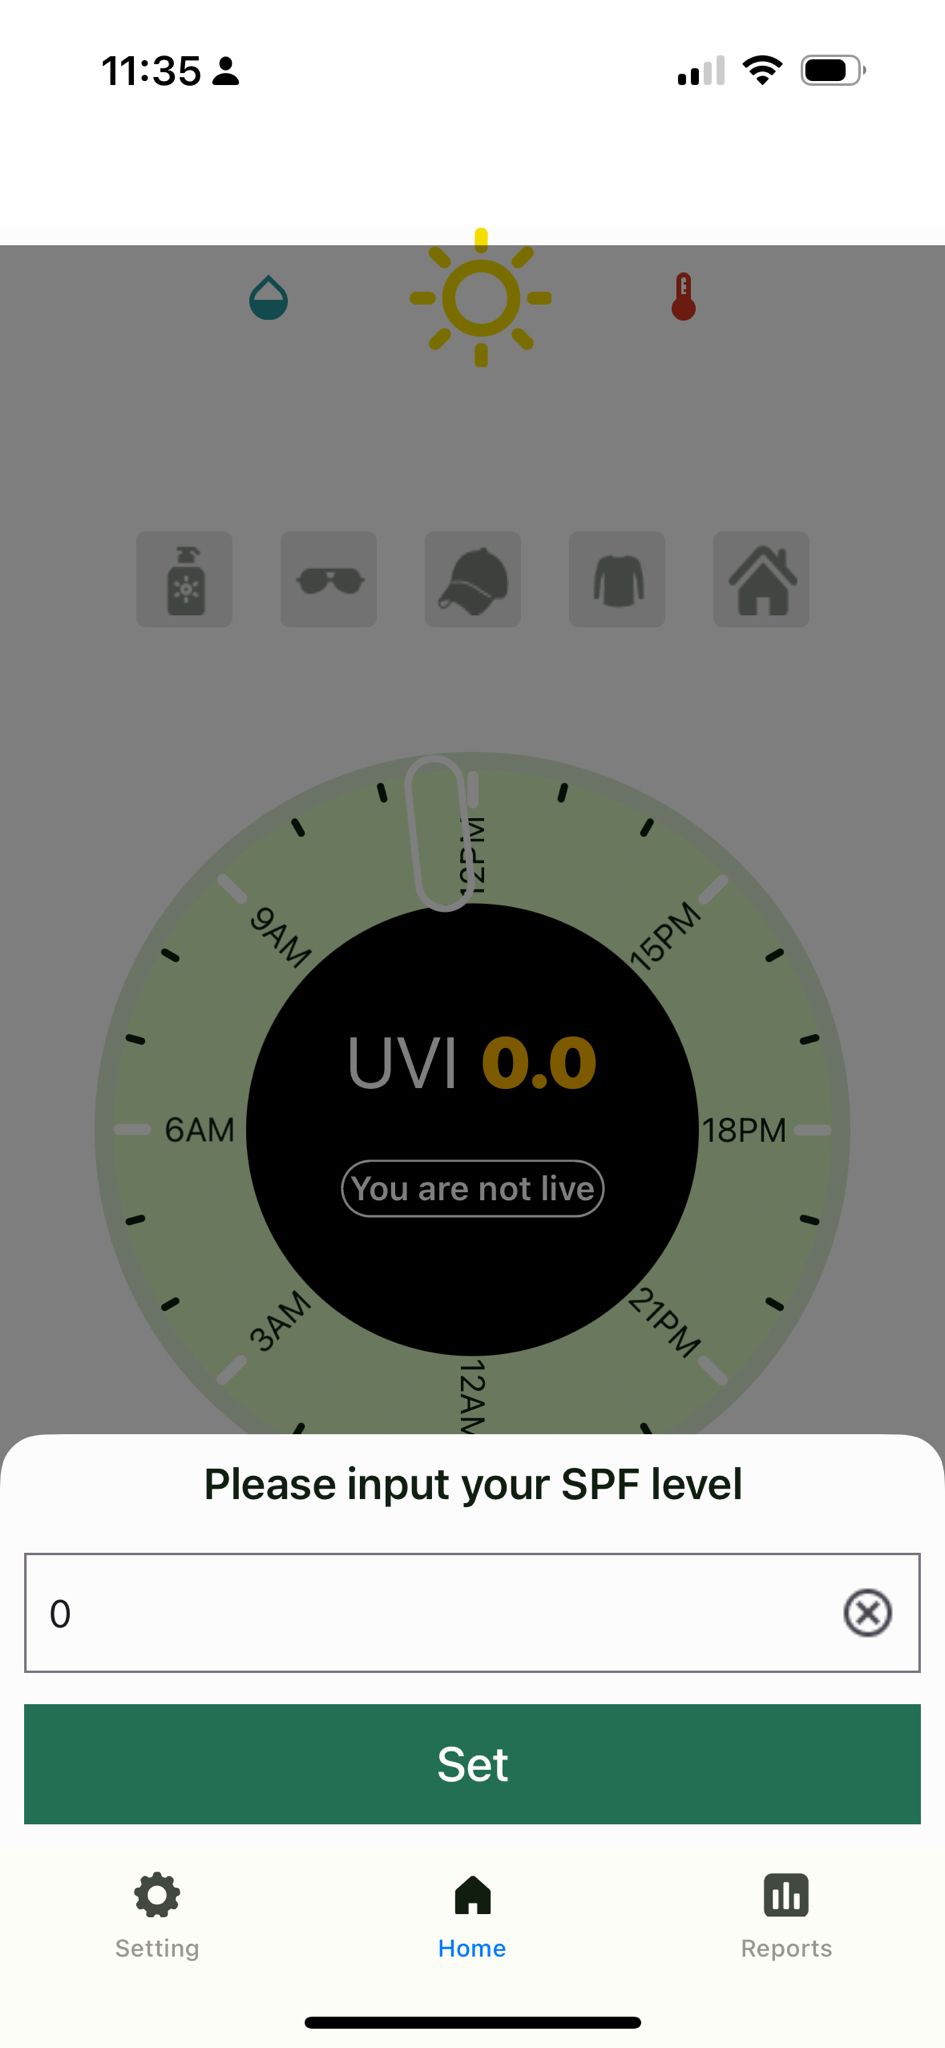
- Set Your SPF Protection: Here, you can input the Sun Protection Factor (SPF) level of the sunscreen you are using. This helps the app to better advise you on exposure times and safety precautions.
-
Navigation Menu Bar:
- Navigating the App:
- Settings: Tap here to customize app settings, connect to device, Skin type setting, Messaging, or manage your account.
- Home: This brings you back to the main dashboard screen from any other page within the app.
- Reports: Access geographical data and reports on UV exposure. This is useful for tracking high-risk areas on work sites.
- Navigating the App:
Tips for Optimal Use:
- Regularly check the sensor status to stay informed about your environment and keep device connected to the app.
- Don’t ignore alert icons; they are crucial for avoiding potential hazards.
- Use the UV live monitor to plan your outdoor activities safely.
- Update the SPF level whenever you apply a new sunscreen for accurate recommendations.
- Utilize the navigation menu to explore additional features and information provided by the app.
-
-
-
-
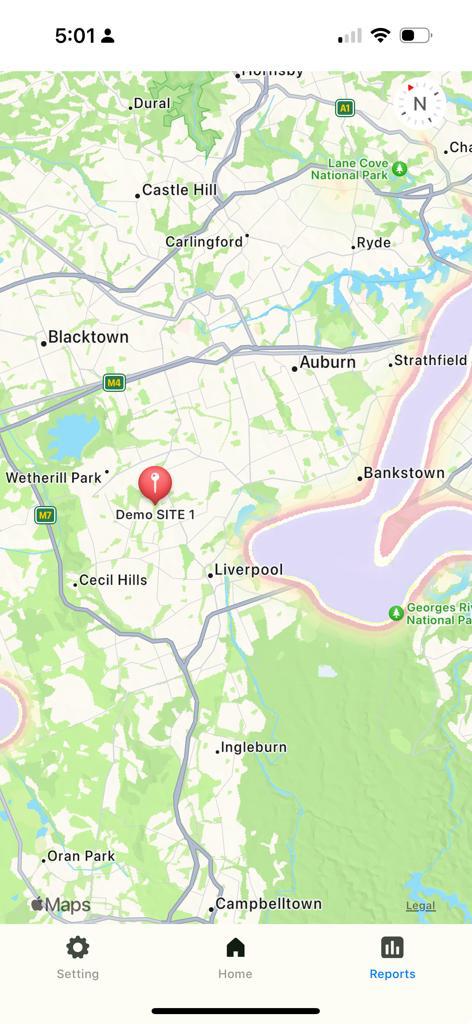
The "Reports" page on your mobile app allows you to view your daily exposure report, providing essential information about your on-site exposure. This report details your location on-site and the duration of exposure. To access this valuable information, follow these steps:
Instructions:
-
Navigate to the Home Screen:
- Open your mobile app and ensure you are on the home screen. This is typically the initial screen that appears when you launch the app.
-
Locate the "Reporting" Tab:
- Look for a tab or button labeled "Reports." This tab is your gateway to viewing your daily exposure report.
-
Tap on the "Reporting" Tab:
- Gently tap the "Reports" tab to access the page. It may be represented as a text label or an icon, depending on your app's design.
-
View Your Daily Exposure Report:
- Once you've entered the "Reports" page, you'll find a detailed report that shows where you have been exposed on-site and the number of hours you've spent in each location.
Tips:
-
You can often navigate back to the home screen or other app sections by using a dedicated "Home" button or an app navigation menu.
- The information on the "Reports" page is vital for tracking your on-site exposure and making informed decisions about your activities.
By following these instructions, you'll be able to easily access the "Reports" page on the home screen of your mobile app and stay informed about your daily on-site exposure.
-
-
-
-
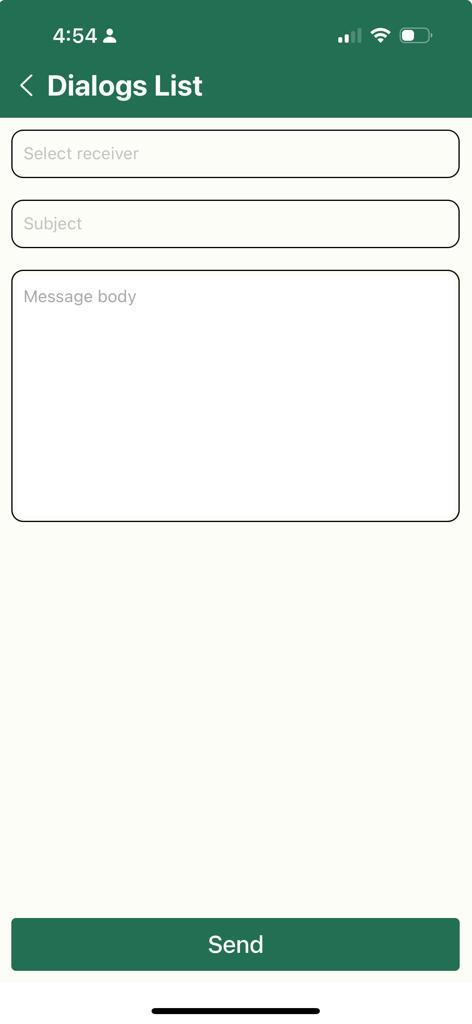
The messaging screen in the settings menu of your mobile app allows you to send messages to your supervisor, making it easy to communicate important information or seek guidance. To send a message to your supervisor, please follow these steps:
Instructions:
-
Access the Settings Menu:
- Start by opening your mobile app, and from the main screen, navigate to the "Settings" menu.
-
Select "Messaging" to Access the Messaging Screen:
- Tap on the "Messaging" section to access the messaging screen, which is where you can compose and send messages.
-
Compose a New Message:
- Within the messaging screen, you should see an option to compose a new message. Look for (+) button that allows you to start a new conversation or message.
-
Select Your Supervisor as the Recipient:
- When composing a new message, you will need to specify the recipient. In this case, select or search for your supervisor's name from your contact list or address book.
-
Write Your Message:
- Enter the message you wish to send to your supervisor. You can type your message in the provided text field. Be clear and concise in your communication.
-
Send the Message:
- After composing your message, there should be a "Send" button or icon. Tap this button to send your message to your supervisor.
-
-