Topic outline
-
-
Logging In
-
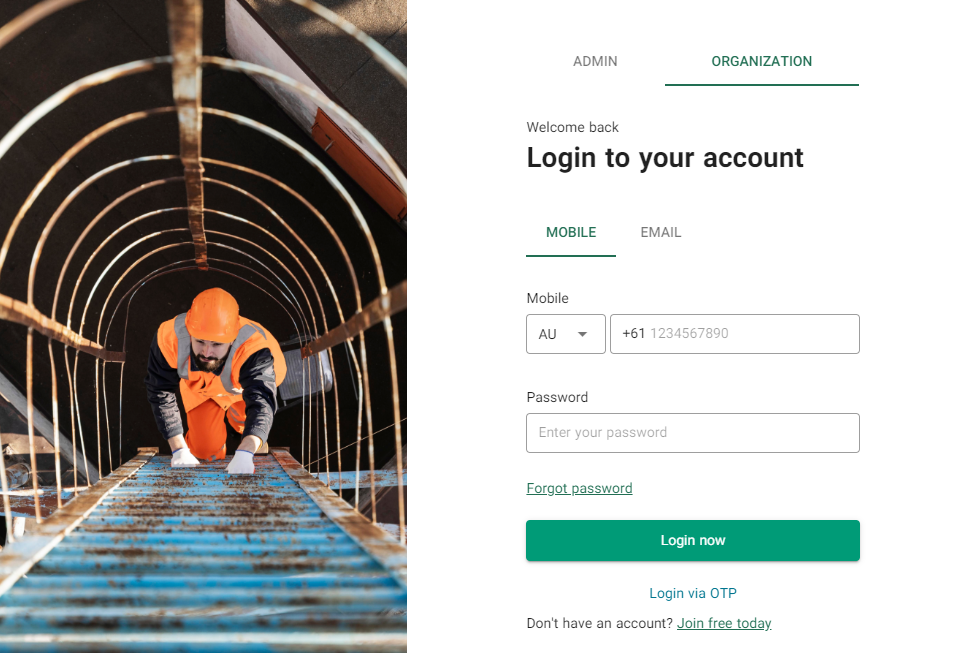
Select the Organization Tab
- Open your web browser and navigate to the Metasense dasshboard https://dashboard.metasense.com.au.
- On the Metasense dashboard login page, look for the "Organization".
-
Login with Email or Phone Number and Password
- After selecting the "Organization" tab, you will be prompted to enter your login credentials.
- Enter your registered email address or phone number in the designated field.
- Input your password in the password field. Make sure the password is correct and case-sensitive.
-
Select an Organization (if applicable)
- If your Metasense account is associated with multiple organizations, you will be presented with a list of these organizations after successfully logging in.
- Review the list of organizations and select the one you want to access. Click or tap on your desired organization to proceed.
-
-
-
-
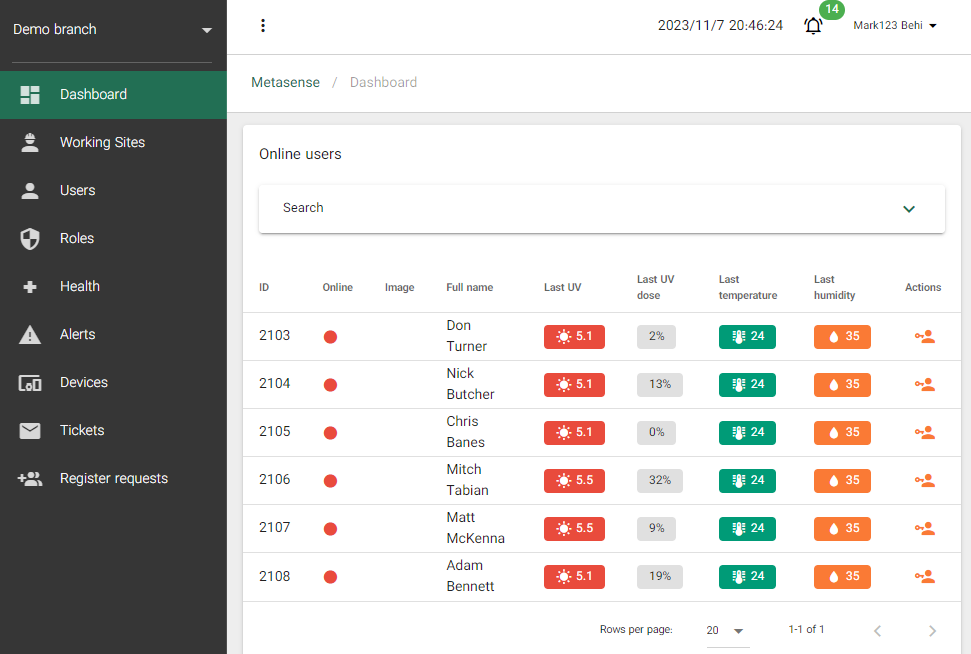
The Metasense Dashboard Home Page is a comprehensive tool that provides a wide range of information related to UV exposure and user activity. This guide will walk you through the different sections and functionalities of the dashboard.
Online Users List
- Online Users List: This section displays a list of online users. Online users will have a green status indicator, while offline users will have a red status indicator.
- Last UV: Shows the latest recorded UV level for each user.
- Last UV Dose: Displays the last UV dose recorded for each user.
- Last Temperature: Shows the last recorded temperature for each user.
- Last Humidity: Displays the last recorded humidity level for each user.
- Action Button: Click on the action button to edit user information.
- Search/Filter Function: Use the search and filter function to search for specific users by username and working site.
-
-
-
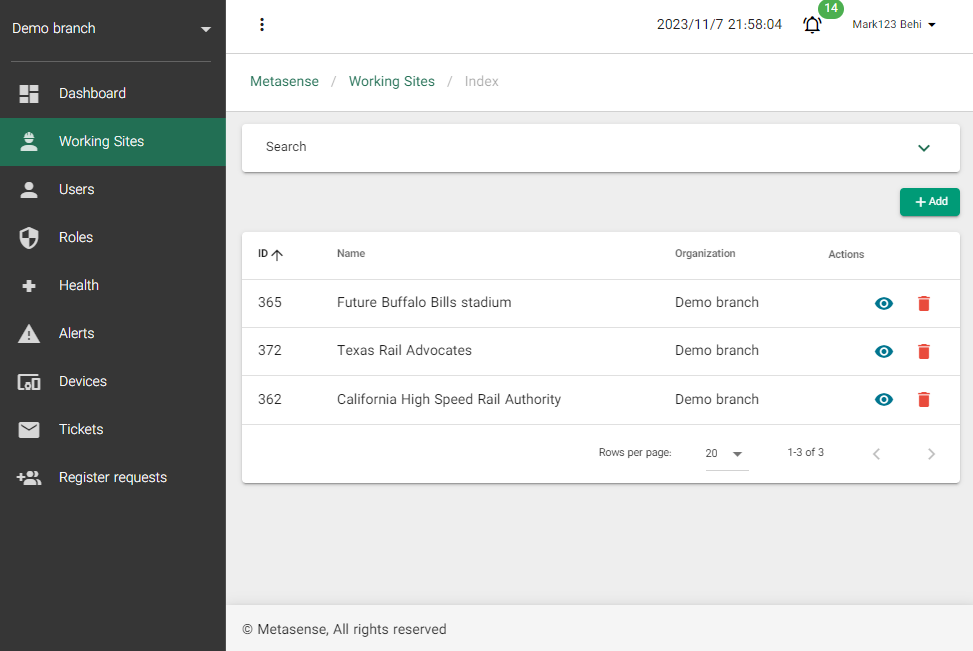
The Table View on the Working Sites Page displays a list of all the working sites in your organization. The table has the following columns:
- Name: This column lists the names of the working sites.
- Organization: Displays the organization to which each site belongs.
- Actions: The "Actions" column contains two buttons:
- View Detail: Allows you to view detailed information about a specific site.
- Delete: Lets you delete a site. Be cautious when using this option, as it permanently removes the site and all associated data.
-
To view detailed information about a specific site, click on the
 button in the row of the site you want to explore further.
To remove the site click on
 button.
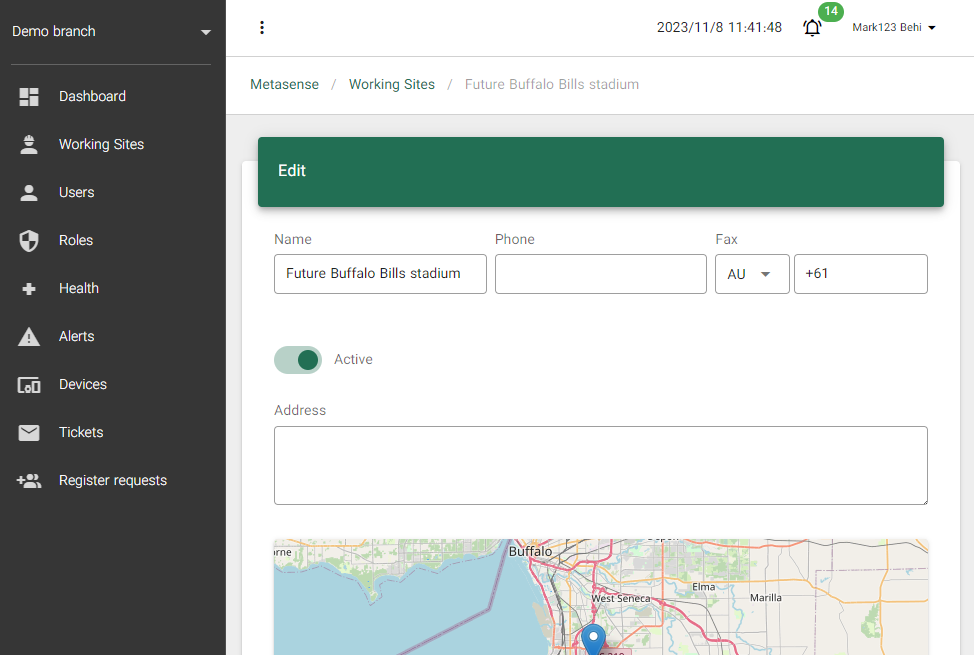
Edit Section
Within the site detail view, you'll find an "Edit" section. This section allows you to modify various aspects of the site:
- Site Name: Edit the name of the site.
- Phone and Fax: Update contact information for the site, including phone and fax numbers.
- Active/Inactive: Toggle the site's status between active and inactive.
- Address: Modify the physical address of the site.
- Logo: Upload or change the site's logo to personalize its representation.
Users Section
The "Users" section displays a list of users associated with the site and allows you to manage them. Here's how to use this section:
-
List of Users: You can see a list of users currently associated with the site. This includes their names, roles, and contact information.
-
Add Users: To add new users to the site, click the "Add Users" button. You can specify their roles and contact details as needed. Make sure to save your changes.
Total Activity & Activity Under Sun
- Total Activity Chart: This chart displays the total user activity.
- Activity Under Sun Chart: Shows user activity under the sun.
- Filter Function: You can filter both charts by specifying a date range, user, working site, and organization.
UV
- UV Index Chart: This chart displays the UV index over time.
- UV Dose Chart: Shows the UV dose recorded over time.
- Filter Function: You can filter the UV data by specifying a date range, user, working site, and choose a timeframe label, such as "Active," with options of Daily, Week, Month, and Year.
UV Dose Notifications
- UV Dose Notifications: This section presents a pie chart showing the rate of responses to UV dose notifications. Responses include "I will not renew the Sunscreen," "I will renew the Sunscreen," "I will change my location as soon as possible," and "Unseen."
- Filter Function: You can filter the notifications data by specifying a date range, user, and working site.
Sunscreen Notifications
- Sunscreen Notifications: This section provides a pie chart to compare responses to sunscreen notifications, including "I will not renew the Sunscreen," "I will renew the Sunscreen," "I will change my location as soon as possible," and "Unseen."
-
-
-
Users
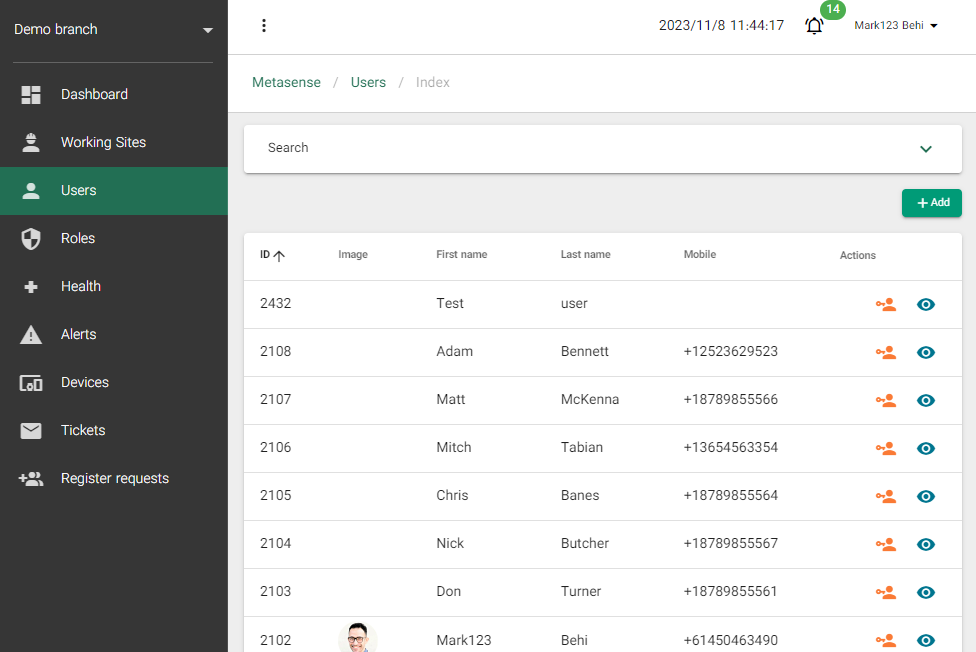
The User List View is the primary section of the User Page, displaying a list of users and their basic information.
-
Table List View: The User Page displays a list of users in a table format. The table includes the following columns:
- Image: Displays the user's profile picture.
- First Name: Shows the user's first name.
- Last Name: Displays the user's last name.
- Mobile: Shows the user's mobile number.
- Action Buttons: This section includes two buttons:
- View Detail: Click on
 button to view detailed information about a specific user.
 - Permissions: Click on
 button to manage the user's permissions and roles.
- View Detail: Click on
-
Add New User Button: To add a new user, click the "+ Add" button. This will allow you to create a new user profile with relevant details.
-
Search and Filter: To make it easier to find a specific user, you can use the search and filter options. You can search for users based on the following criteria:
- User ID: Enter the user's unique ID to find them quickly.
- First Name: Search for users by their first name.
- Last Name: Search for users by their last name.
- Mobile: Search for users by their mobile number.
-
-
User Detail
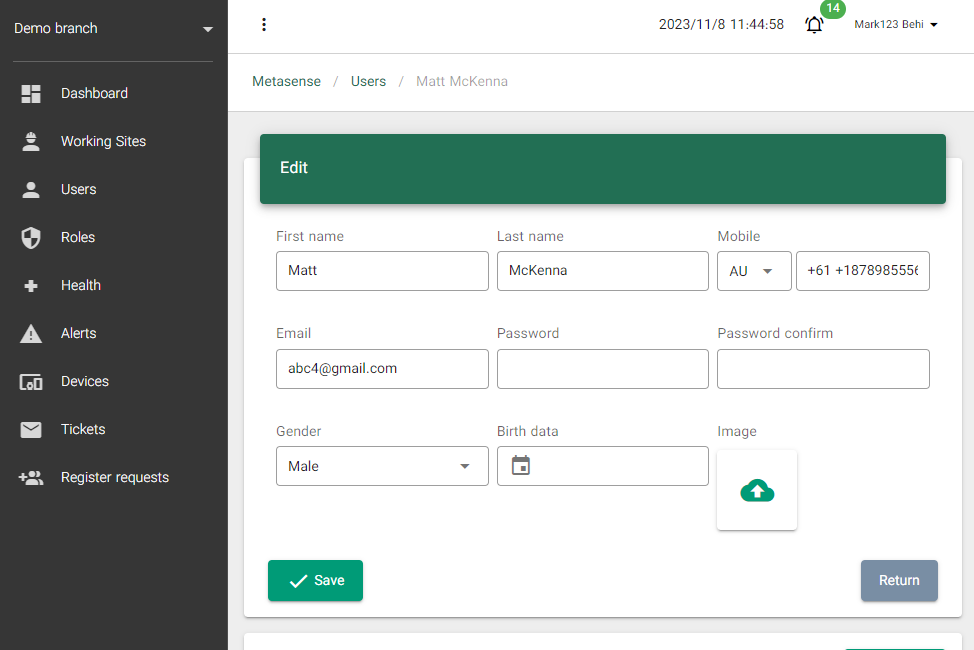
When you click on the "View Detail" button for a specific user, you will be taken to the User Detail Page. Here, you can access various sections to view and manage user information.
-
Edit Section: In this section, you can update user information, including:
- First Name
- Last Name
- Mobile
- Email Address
- Password
- Gender
- Birth Date
- Image
-
Total Activity & Activity Under Sun: This section provides information about the user's total activity and activity specific to a given time frame (e.g., daily or weekly).
-
UV: This section displays UV-related information, such as UV index, and UV does.
-
UV Alerts & Notifications: Here, you can find notifications and alerts related to UV does and user responses.
-
-
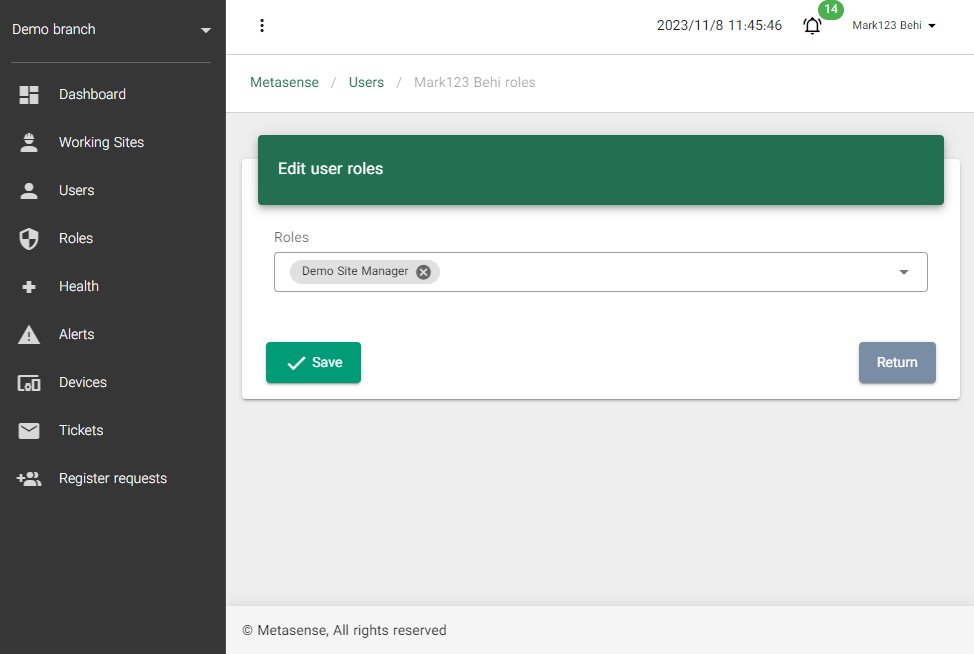
User Permissions
When you click on the "Permissions" button for a specific user, you will be directed to the Permissions Assignment Page. This page allows you to assign the user to different roles and manage their permissions. You can control what actions and features the user can access within the system.
-
Roles
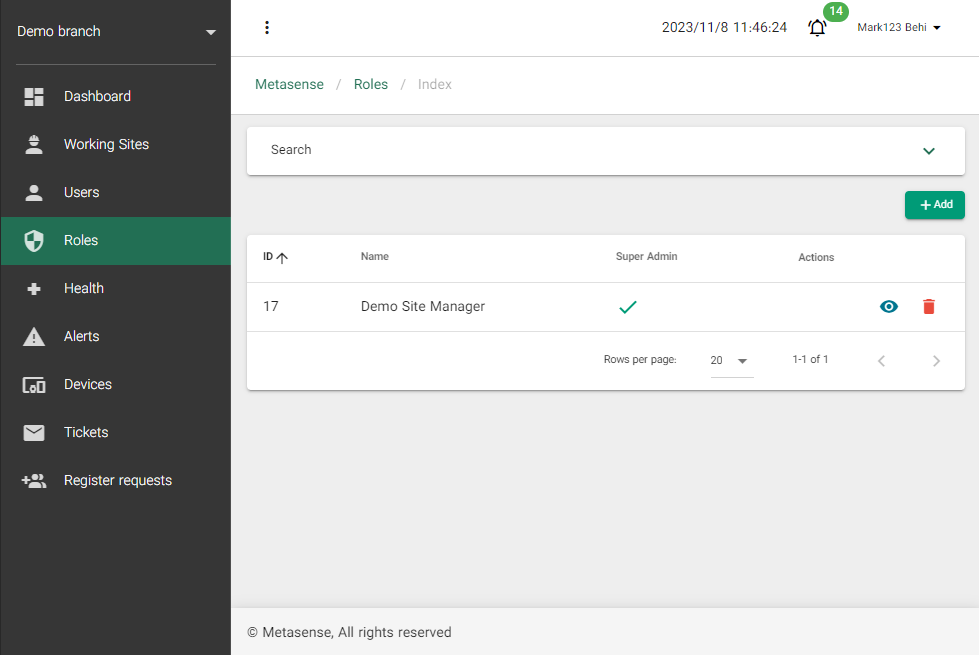
The Roles page, where you can manage and organize roles within your organization. This page allows you to view, add, search, and perform actions on defined roles.
-
Table List View:
- On the Roles page, you will see a table list view that displays defined roles within your organization.
- The table includes the following columns:
- Name: This column displays the name of each role.
- Super Admin: This column indicates whether a role has super admin privileges.
- Actions Buttons:
- View Detail: To view details of a role, click the "View" button in the corresponding row
- Delete: To delete a role, click the "Delete" button in the corresponding row.
-
Add New Role:
- To add a new role, locate and click the "+ Add" button, located at the top of the page.
- You will be directed to a new page or form where you can enter the details of the new role.
-
Search/Filter:
- There is a search/filter section that allows you to search for roles based on specific criteria.
- You can search for roles by the following criteria:
- ID: Enter the ID of the role you want to search for.
- Name: Enter the name of the role you want to search for.
- Super Admin: Specify whether you want to filter roles with super admin privileges or roles without super admin privileges.
Deleting a Role
- In the "Actions" column for that role, click on
 button.
 - A confirmation prompt may appear to confirm your action. Follow the on-screen instructions to confirm the deletion.
Viewing and Editing a Role
- In the "Actions" column for that role, click on the
 button.
 - You will be directed to a new page that displays the role's details.
- On this page, you have the ability to review role permissions and make modifications. Once you've made the necessary changes to the permissions list, simply click the "Save" button.
-
-
-
-
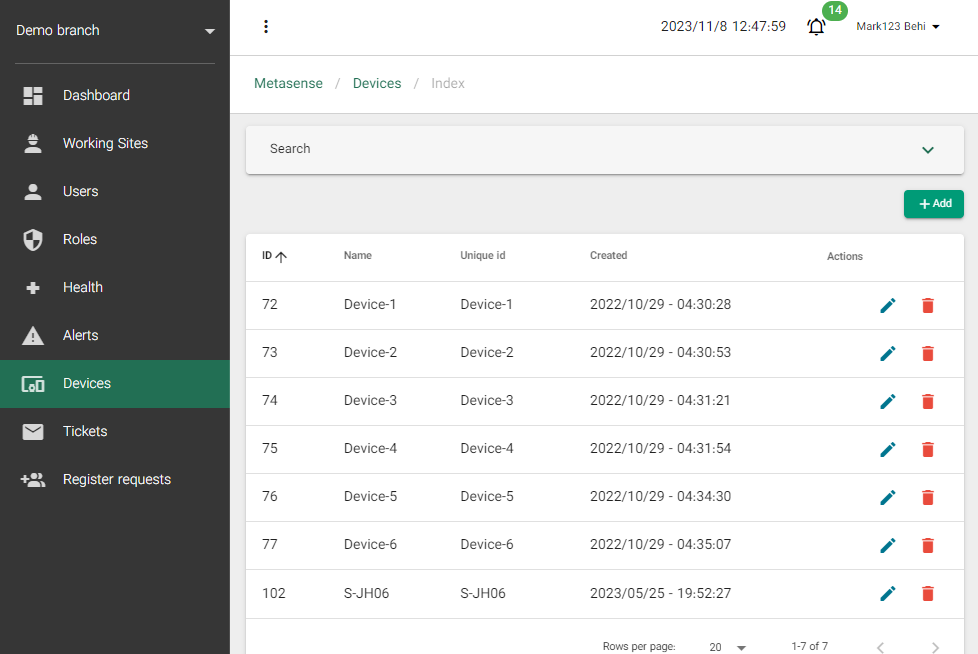
Devices List
This page provides a convenient way to view, add, edit, and delete devices, as well as search for specific devices using various filters.
-
Table List View: The table on the Devices Page displays a list of devices added to your organization. The table includes the following columns:
-
Name: The name of the device.
-
Unique Id: A unique identifier for the device.
-
Created: The date when the device was added to the organization.
-
Actions: This column provides options to edit or delete the device.
-
Edit: Click on
 button to make changes to the device's information, such as name and status (from active to inactive).
 -
Delete: Click on
 button to remove the device from the organization. Be cautious when deleting devices, as this action is irreversible.
-
-
-
Add New Device: To add a new device to the list and assign it to a user, follow these steps:
- Click the "+ Add" button, located at the top of the devices list.
- You will be directed to a new page or modal where you can provide information about the new device, such as its name, unique ID, and user assignment.
- After filling out the required information, click the "+ Add" button to add the device to the organization.
-
Search/Filter: The search and filter section allows you to efficiently find devices based on specific criteria. You can search for devices by the following parameters:
-
Device ID: Search for a device using its unique ID.
-
Name: Search for a device by its name.
-
Status: Filter devices by their status, such as "Active" or "Inactive."
-
Added Date From/To: Specify a date range to filter devices added within a particular time frame.
-
Enter your search criteria in the corresponding input fields.
-
Use date pickers to select the added date range.
-
Click the "Apply Filter" button to apply your search criteria. The table will display only the devices that match your filters.
-
-
-
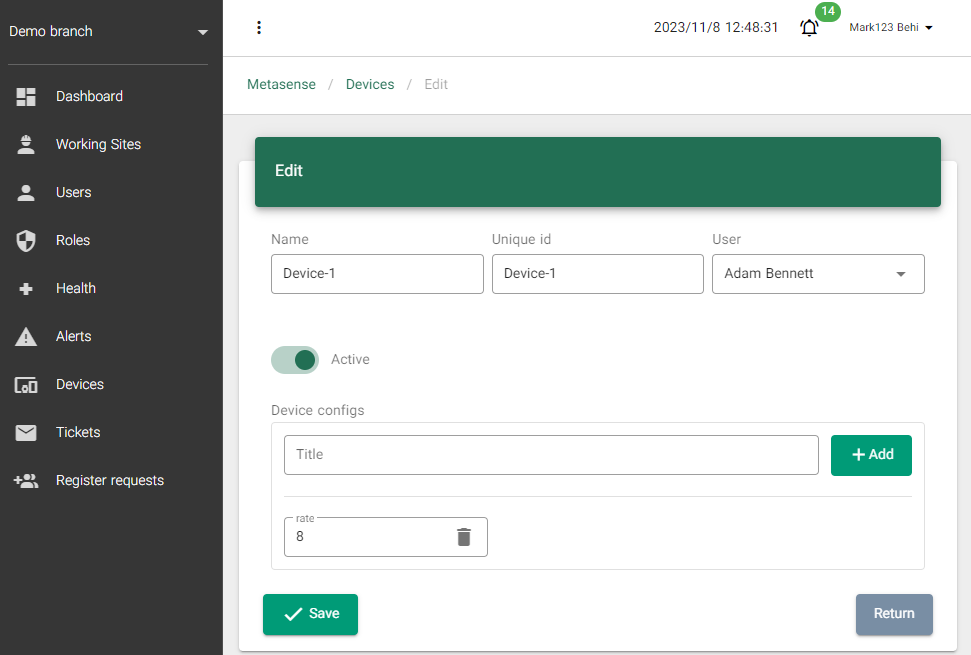
Managing Devices
- To delete a device, simply click the "Delete" button in the Actions column. Confirm the deletion when prompted. Remember that this action cannot be undone.
- To edit a device or change its status from active to inactive, click the "Edit" button in the Actions column. Make the necessary changes, and save the modifications.
-
-
-
Alerts List
The Alerts Page presents you with a table view of received alerts from your SafeSpot devices.
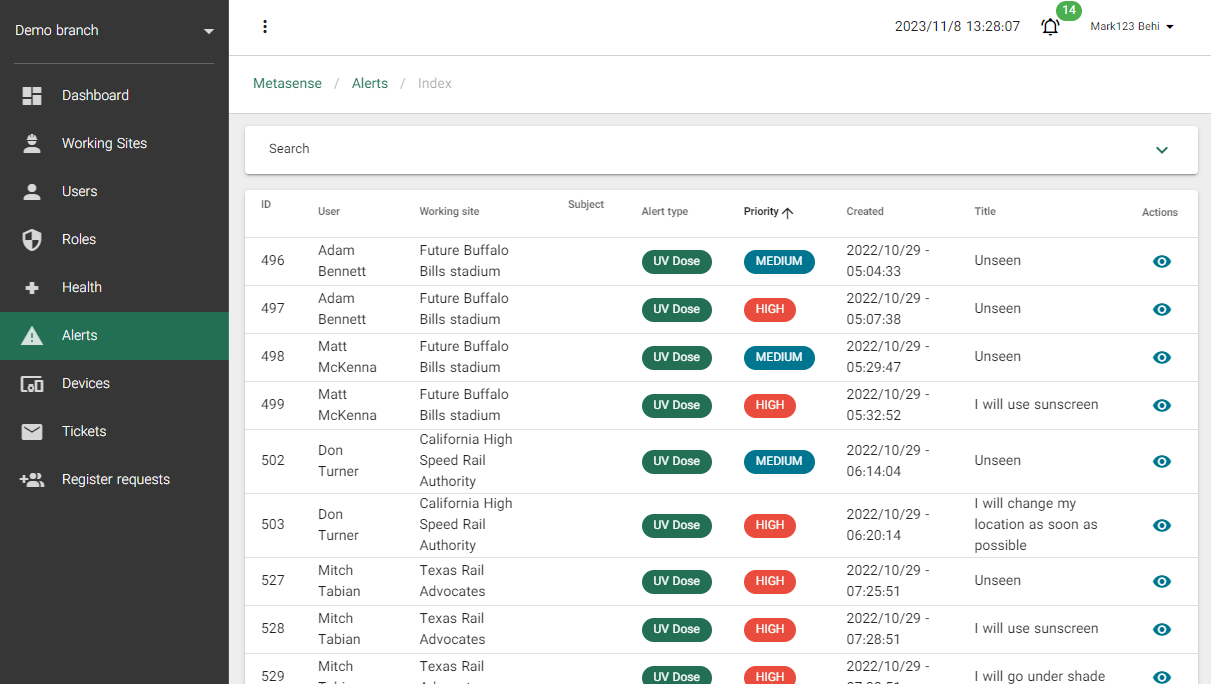
This table includes the following columns:
-
ID: This is a unique identifier for each alert, making it easy to reference specific alerts.
-
User: Displays the user's name associated with the alert. You can quickly identify who triggered the alert.
-
Working Site: Shows the user-assigned site for which the alert was triggered, helping you understand where the issue is located.
-
Alert Type: Indicates the nature of the alert, which can be either "UV Dose" or "Heat."
-
Priority: Reflects the urgency of the alert, categorized as "Low," "Medium," or "High."
-
Created: Displays the date and time when the alert was received.
-
Title: This column provides an option for users to respond to the alert, and it displays the user's response if available.
-
Action: Allows you to view the detailed information about the alert by clicking on it.
Alert Types and Priorities
-
Alert Types:
- UV Dose: Alerts related to excessive exposure to ultraviolet (UV) radiation.
- Heat: Alerts associated with elevated temperatures or heat-related issues.
-
Priority:
- Low: Alerts of low urgency, typically indicating minor concerns.
- Medium: Alerts of moderate urgency, requiring attention but not immediately critical.
- High: Alerts of the highest urgency, indicating a severe issue that demands immediate action.
Viewing Alert Details
To view the detailed information about an alert, follow these steps:
-
Locate the alert in the table that you want to investigate.
-
In the "Action" column, click on
 option for the corresponding alert. This will take you to a dedicated page where you can access the following details:
- Alert ID
- User's name
- Working site
- Alert type
- Priority
- Created date and time
- User response (if available)
-
-
-
-
Tickets List
The Tickets Page allows you to manage received messages from users and sent tickets to users.
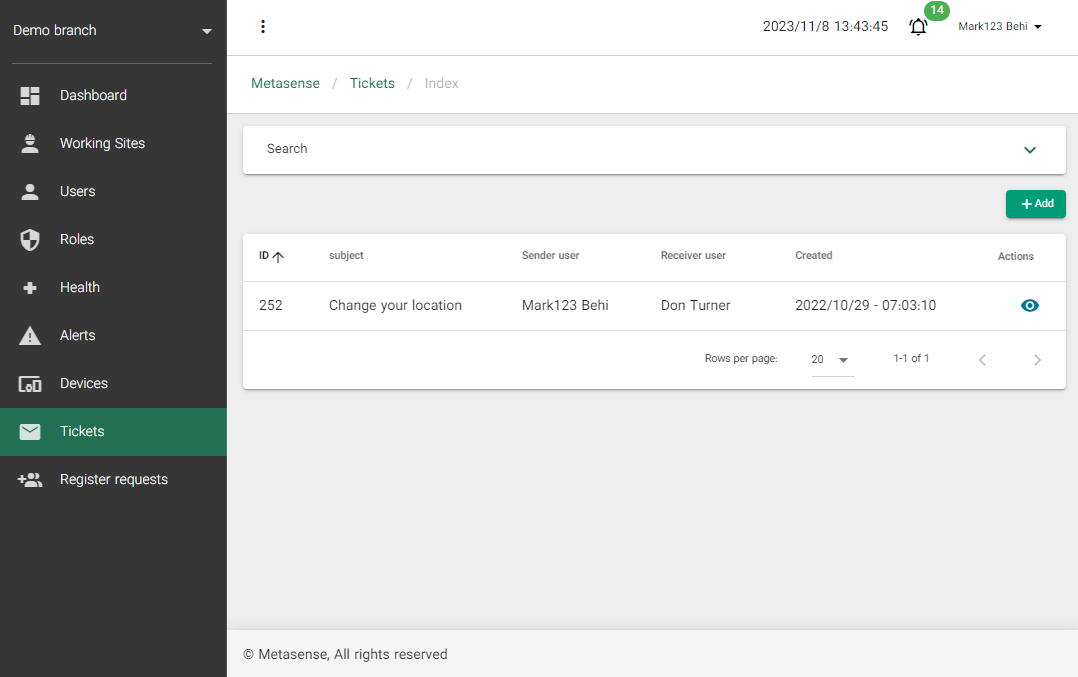
The table list view provides an overview of your received messages and sent tickets. Here are the columns and actions available in this view:
- Subject: Displays the subject of the message or ticket.
- Sender User: Shows the user who sent the message or ticket.
- Receiver User: Displays the user who received the message or ticket.
- Created: Shows the date and time when the message or ticket was created.
- Actions:
- View Detail: Click on
 button in the "Actions" column to view the complete details of the selected message or ticket. This will provide you with more information about the communication.
- View Detail: Click on
-
Send Ticket/Message
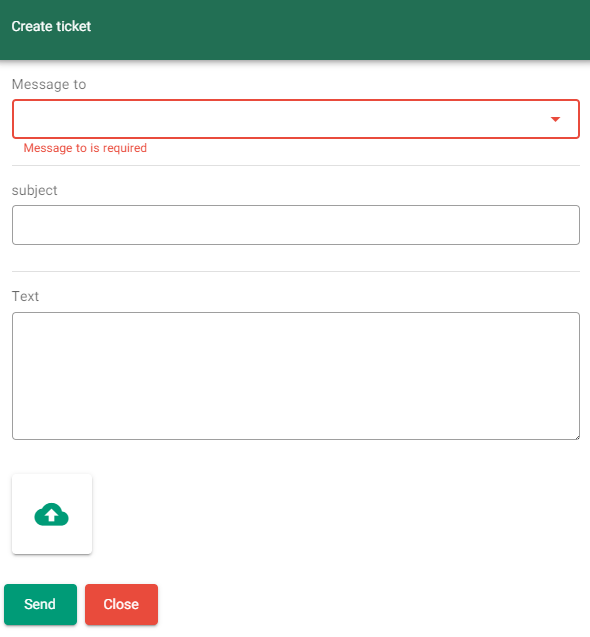
You can send a new ticket or message to a user by following these steps:
-
Click on "+ Add": To send a new ticket or message, click on the "+ Add" button. This will open a popup where you can enter the details of your new communication.
-
New Ticket Popup: After clicking "+ Add," a popup window will appear with the following fields:
- Message To: Select the recipient user from a list or input their username.
- Subject: Enter the subject of your message or ticket.
- Text: Type your message or ticket content in the provided text field.
- Attachment: If necessary, you can attach image to your message or ticket.
-
Send and Cancel Buttons:
- Click the "Send" button to send your message or ticket to the selected user.
- If you decide not to send the message or ticket, click the "Cancel" button to close the popup without sending your Message.
-
-